It's been a long while since my last post, but I've done pooploads of work over that time.
I definitely backpedaled on the whole fingerless gloves idea. I'm not really skilled enough or patient enough to put up with something so annoying. Anyway, I can't stand making anything in pairs. They never look similar and there are always problems, and one always looks way better than the other. So I tossed that idea and went back to another Steampunk classic: goggles. Every self-respecting airman has one while piloting his dirigible, no? So, it was back to Google information and instructions.
Surprisingly, there are quite a few decent tutorials for these. Most follow the same basic principles of design, so I just picked out one of the best ones to loosely follow. I almost never rigidly follow tutorials anyway.
 This tutorial at Epbot has great photos and create some very delicate, ladylike looking goggles. Other ones I saw were a bit heavy looking. Incidentally, the woman behind Epbot also happens to run the hilarious blog Cake Wrecks!
Anyway, the instructions call for some heavy-duty metal pipe and power tools to cut it to make the circular bases for the goggles. Combine brokeness and an inherent fear of things that are sharp and spinning, and you get me having to replace it. I decided to make the two rings out of clay. The picture at left is a part of the process where they weren't very evenly shaped yet. I used a lighbulb to mark the inside circle.

I cut lenses out of plastic from a container and messed around with coloring them, because I didn't really like them clear. I decided on this dark blue color using a sharpie. It was already decided back in the planning process that since this was a photo contest, I would make them display-only (meaning I would hang them around my neck). I'm pretty much blind without my glasses on anyway, and there is no real foreseeable way to make goggles that would fit over my square frames anyway. So I didn't think it would be that bad if I fudged the visibility a bit.
After gluing on the lenses, I moved on to the eye cups that really solidify the goggles look. After playing around with a few patterns, I cut my leather, using my heavy duty black stuff. The soft suedy back looked better (leather-on-leather gets a bit shiny). I folded the edges inwards and spread Gorilla glue into them. Bad idea. Gorilla glue needs SO MUCH pressure on it and long time to adhere and t expands when it dries. If it gets on your fingers it will not come off for years.

 Anyway, they did eventually adhere. The pictures show the leather bits before I glued them onto the rings and then the product afterwards. At this point I used more Gorilla glue (blast that stuff to hell) to make a nose piece. Next I cut straps. To make them adjustable, I sewed thin strips of leather to the edges so I could tie them. I also glued decorated brass buttons (one is an anchor design and one is some sort of family crest) to the sides. Now I'm done! Here are two pictures of them in all their glory! (terrible night photo quality, I know)


November 6, 2011- Hat Decoration
I did say that I was going to make ruching because I didn't want to go through the annoyance of making bias? That's before I remembered that you make ruching from....bais strips. Ah, well.
I got to that and cut a few strips, sewed them together, and then folded them up the old fashioned way (I'm too cheap/lazy/poor to get a bias strip maker thing) and ironed. Then I drew a zig-zag pattern on the strip and basted over the lines.
I turned out my fabric didn't particularly like ruching. I ended up snapping the string quite a few times (note to self: get some strong silk thread for ruching) and just generally bieng annoyed by the thing. After a little while, I ended up getting it gather up in a satisfactory way. If I ever use this method in the future, I'll make sure to clip the thread at regular intervals to make it easier. Live and learn, eh?
After that, I slapped it onto the brim of the hat with glue and waited for that to dry. While that happened I got out my leather scraps to make some gathered flowers. I have two stashes of leather. One was a 5 buck bag of scraps that a shoe-maker at my local Renaissance Faire was selling. It's a zip lock sized back full of moderately tough leather in a few colors, but mostly black, most of which are a few inches across. The other is a few slightly larger scraps that a friend of mine who was cleaning out her stuff gave me. It's this really soft, supple type stuff with a very soft back (what's the leather craft term for that?) that is a reddish tan color. I tried it out on my machine and found out that while it does sew easily, my machine's basting stitch just isn't big enough to gather it up. So I just took out my big tapestry needle and made a few huge stitches along the bottom of an inch wide strip and gathered it up.


My make-things-difficult-for-myself impulse yearns to be fulfilled! There are some decent instructions for gloves on the interwebz. I'm hoping to mash together a few to get what I want. I'll make one up in crap fabric to see if I can actually do it. If not, it's fingerless hand spats for me. I've got Tuesday (election day) off to work.
November 2, 2011- The Hat is Almost the Death of Me
Boy, oh boy did I do a lot of work for this! Over the past few days (helped by a surprise sickness which allowed me to be at home) I have made some real headway on this thing.


As usual, in my brain I was imagining how the fabric covering would go as a quiet, relaxing half-hour where I would calmly pleat the fabric onto the hat because it looked soooooo easy when Koshka the Cat did it with her hat. Even if it was like a totally different shape than mine. Ah, overestimation of my decidedly novice-like crafting skills.
Anyway, I used this sort of fauxy type leathery suedy stuff I got at Jo-Ann and made this costume cloak for a while back. I'm not sure what it is, but it's easy enough to work with.
 I cut the gathered bit off and laid it over the hat, ready to start pleating. After a pleat or two, I discovered this was not going to be as easy as I thought. The glued canvas may be good and stiff, but it does not like pins at all. I ended up bending up half of my crappy ones doing it. Pic at left showing halfway throughout the process. Plus, the tapered shape made it a bit different from Koshka's hat. An half-hour, a billion bent pins, and several cursewords later, I ended up having to shove a ton of fabric underneath the last pleat.
 After I began pleating the underside (which I have no decent photos of), I ended up taking half of the crown pleats out and re-doing them, plus cutting out a bunch of the fabric. I finally shoved it in a bunch of pleats into the bottom of the hat and trimmed the excess fabric underneath. Now came another problem: attaching the fabric to the hat. I COULD NOT take the fabric off and put glue on the hat. I ended up gluing under the pleats and gluing the excess of onto the inside.
This sort of attached it in a loose sort of way. I placed the extra gathered bit from the cloak around it to hold it in place some more. I was originally going to use tea-stained bias strips, but I think I'll just make some ruching now, because it'll save the annoyance of making bias. I think now I'll just make one or two rosettes to decorate, plus the feathers I have. Check out the photo:
October 29, 2011- Working on the Hat
FINALLY after a busy week I've gotten some great time to work on my costume!
As I said, I'm using Offbeat Bride's instructions as a basis for my little hat. After looking them over and and testing out some patterns from cardboard, I decided not to use that material because it really just creased way too much. I wasn't going out to buy buckram, so I decided on trying to glue together layers of canvas to get a stiff-yet-bendy buckram-like material. After testing it out, I was surprised how well it worked.
 I got down to business and cut three layers of rectangular canvas for the crown of the hat. I glued these together and spread another liberal layer over both exposed sides and waited to dry. The result was amazingly succesful and I got this great stiff cone of canvas. I decided I wanted it to be slightly tapering towards the bottom so I cut the edges on a angle.
 Next I cut a rough type circle (always better to have it too big than too small!) and then added tabs to inside so I can attach them better. The picture at left shows the 3 layers pinned and cut, as well as a good view of that crown (temporarily taped together). I glued that together and it is now currently drying up so I can attach the two pieces. My plans next will be to create a top for the crown and then cover the whole thing it fabric, but not the way the instructions say because I haven't any decent spray adhesive and I thought after remembering Koska the Cat's little demo on pleating fabric onto a hat, that I'd do that. Then I'll make some rosettes or and other decorations.
On another note, it's snowing really hard. In October. I'm making pumpkin pie in celebration :D
October 25, 2011- Starting to Think
Well, I'm just starting this costume diary. I'm entering a local Steampunk contest. It'll be my first foray into the world of Steampunk, but I've been interested in it for a little while now. I love the pseudo-victorianism of the whole thing, mixed with some amazing industrial images. See beautiful pic at lower left.
 When I got started thinking about this, I knew that I'd keep this one at the lowest budget possible (as in, found objects only) so as not to be annoying. I'm much too busy at the moment to get into something as great as that.
 Oh well. It's fun to make do. Sort of.
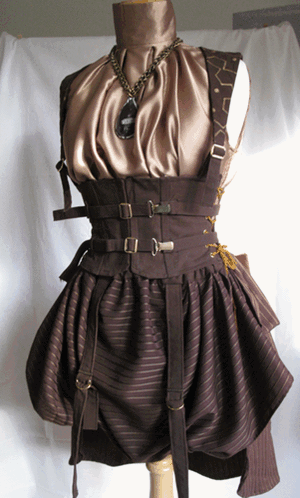
As my first step in what they call in France costuming of le budget, I got started thinking about the overall look. My first inspiration was this sort of sailory type jacket I bought recently. It'll do great as a starter piece. Building off that, I worked out a color pallete of blues/navys, browns, and beiges. I added this sort of shirt that has a front and high collar reminiscent of Edwardian styles.
 Here is where I'm thinking of actually getting down to crafting. The costume needs some real "steampunk" accessories to solidify the look. After poking around various costly and annoying looking tutorials for goggles, I nixed that idea. I decided I'd do a top hat, a smaller type one that you can clip to the hair in a charmingly jaunty fashion, a la pic at right.
I'm thinking of making some loverly gathered flowers from leathers and some feather for a good look. After poking around hat tutorials, I found this this one at Offbeat Bride.
I'll work on that on the weekend. Pics will come.
I'm also playing around with the idea of possibly making some vambraces/fingerless gloves. Time will tell. My deadline's in December.
No comments:
Post a Comment